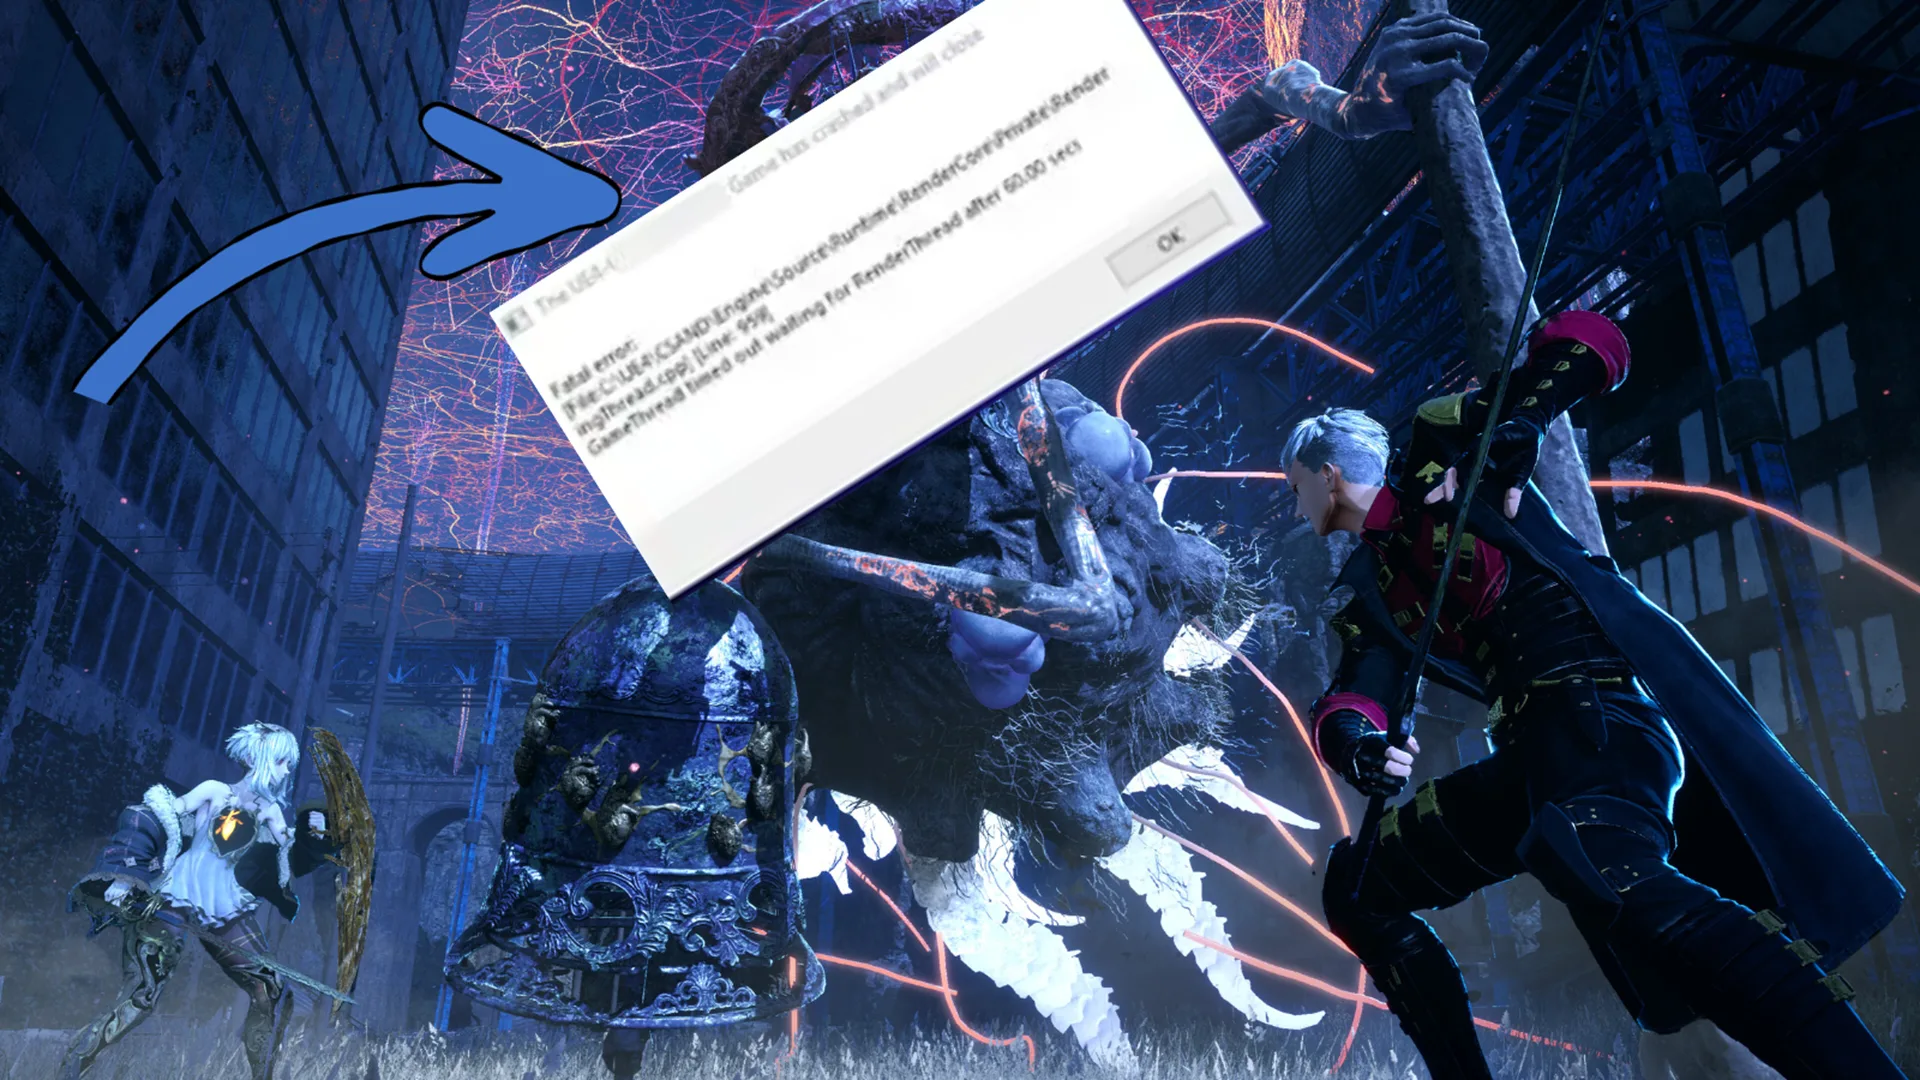
Unreal Engine games are known to have a ton of issues and Code Vein 2 is no different. From crashes to running out of memory, Code Vein 2 on PC has suffered from a number of issues since launch. The latest that is popping up these days in the UE Fatal Error.
“Fatal Error” or “UE-CodeVein2 Fatal Error”, it often means the Unreal Engine crashed before the game could load fully, or during shader compilation, resource loading, or DirectX initialization. This can happen at startup, in specific zones, or even mid-game.
Whatever the cause of the UE Fatal error but there are a handful of things you can do to fix this crashing issue in Code Vein 2. Before getting into the more advanced fixes, try running some basic checks:
- Verify Game Files
- Update Graphics Drivers
- Try running Code Vein 2.exe as an Administrator
- Delete all mods (if any)
Most issues are often solved by simply doing these basic checks. But if the UE Fatal Error still causes crashing for you in Code Vein 2, then let’s get into some advanced fixes.
Fix #1: Force DX11
Unreal Engine doesn’t like DX12 and often that becomes the cause of various crashes. Code Vein 2 defaults to DirectX 12, which can cause crashes on some systems, especially older GPUs or driver versions. You can force DirectX 11 like this:
- Open your game’s launch options (Steam → right-click game → Properties).
- Enter:
-dx11
This tells the game to use DirectX 11 instead of 12. Many players find this resolves fatal errors.
Fix #2: Disable Overlays and Background Hooks
Overlays from Steam, Nvidia GeForce Experience, Discord, MSI Afterburner, and other similar tools can cause issues with games that run on Unreal Engine as they compile shaders.
Disable all overlays, including:
- Steam Overlay
- Discord Game Overlay
- NVIDIA/AMD performance overlays
- Any other overlay you can have open
Then restart the game. This simple step fixes a lot of fatal errors.
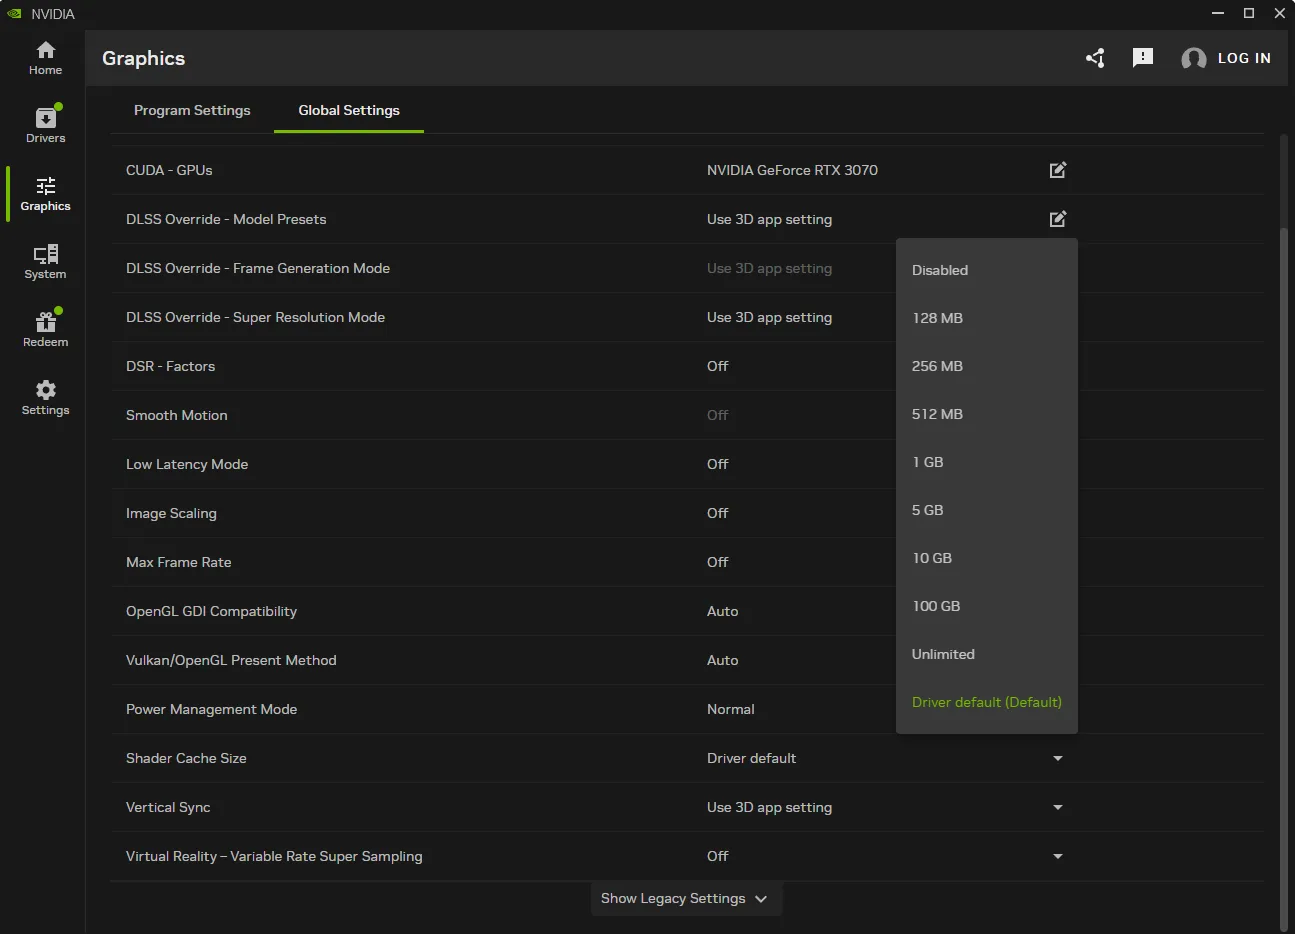
Fix #3: Increase Shader Cache Size
If Code Vein 2 keeps crashing on you then may be try increase the shader cache size and then rebuilt the shader cache. The shader cache size is increased through the Nvidia app. Through the app you can not only increase the size of the shader cache but also clear the shader cache.
- Open the Nvidia App
- Go to the Graphics tab on the left bar
- Open Global Settings tab
- Find the Shader Cache Size setting
- Select “Disabled” and restart your PC
- Open the Nvidia App and go back to the Shader Cache Size settings again, select 10GB or more for the Shader Cache Size
Fix #4: Disable XMP or EXPO
One of the most common things that cause UE Fatal Error crashes is overclocking your RAM. To fix this you must turn of Disable XMP or EXPO from the BIOS settings on your motherboard.
First restart your computer and enter the BIOS/UEFI. This is usually done by pressing Delete, ESC, or F2 repeatedly right after powering on. But if you don’t know what key takes you to your motherboards’ BIOS, there is another simpler way.
- Go to Windows Settings > System tab.
- Click Recovery and find the Advanced startup section, click Restart Now.
- Choose UEFI Firmware Settings, and click Restart again. Your system will now boot directly into the BIOS.
- In your BIOS you need to switch from EZ Mode to Advanced Mode. This is traditionally done by pressing F7 key on most motherboards.
After entering Advanced Mode, navigate to the OC (Overclocking) tab or the Extreme Tweaker tab, depending on your motherboard brand. Look for the XMP Profile (Intel systems) or EXPO Profile (AMD systems) setting.
Change the profile to Disabled or Auto to turn off XMP or EXPO on your motherboard and disable RAM overclocking. Pres F10 to save and exit BIOS. Now boot up Code Vein 2 again and see if your UE Fatal Error is resolved.